Introduction
Welcome to the User Guide for LibMedia.unm.edu. The information here is applicable to users assigned the Media Admin Role. If you need any assistance, feel free to reach out to the UL IT Applications team via: open a ticket.
User Account
An account is required to upload media to LibMedia. To view/listen to media, you'll need a modern web browser. Some content is limited to students/staff/faculty and in those cases the content can only be accessed by computers connected to the university network or via EZProxy.
To request an account, open a ticket to the UL IT Applications team and include your email address; this will be used in LibMedia as the email address to send any password reset requests.
Log In
Currently, the accounts on LibMedia are separate from UNM netids (this may change in the future). To log in, click the login link in the upper right hand corner.

For convenience, here's a link to the login page.
If you are on a mobile device, the login link is found in the floating menu (aka 'hamburger' menu).
.
Change Password
To change your password, log in, click on your user name in the toolbar to change to the user toolbar, then click the 'edit profile' link.

When you change your password, first you'll need to put your current password in (if it's incorrect or not specified, you won't be able to save).

You'll need to enter you new password twice (this helps prevent against having a typo in your new password).

Don't forget to click the save button at the bottom of the page!
The 'Changes saved' message will appear at the top of the page after clicking the 'save' button.

Reset Password
If you have forgotten your password, use the password reset page to request a one time use link that will let you set a new password. LibMedia Password Reset Page
Enter your user name or email address and click submit; an email will be sent to you (usually your unm.edu email address).

The email will look similar to the example here (the link in the example has been truncated and blurred).

Clicking the link will bring you to a confirmation page before proceeding; once you click the login button, the one-time link will no longer work (you'll need to request another reset).

The edit profile page will load with a little reminder at the top that you need to change your password.

You'll need to enter your new password twice (this helps prevent against having a typo in your new password).
Don't forget to click the save button at the bottom of the page!
The 'Changes saved' message will appear at the top of the page after clicking the 'save' button.
Enable/Disable Transcoding Emails
LibMedia is able to send email notifications for completed transcoding jobs as well as for errors. Both of these are configurable in the user profile. To access, click on your user name in the toolbar to change to the user toolbar, then click the 'edit profile' link.
For notification on completion, specify an email address in the "Transcoding Complete Email" field.

For notification on error, specify an email address in the "Transcoding Error Email" field.

Don't forget to click the save button at the bottom of the page!
The 'Changes saved' message will appear at the top of the page after clicking the 'save' button.
Managing Content
This guide focuses on the 'Media' content type. 'Article' and 'Basic page' are available, if you need any assistance with these, contact the UL Applications team: open a ticket.
Uploading New Content
You must be logged in to add new content. Click 'Shortcuts' on the user toolbar; there should be an 'Add content' link that will bring you to the Add content page.

Click on the 'Media' link, you'll be redirected to the Create Media page.

The only required fields are the Title and Category (indicated by a red asterisk ![]() ). The explanation for each of the components is included below.
). The explanation for each of the components is included below.
Title
The Title field is required; this will display at the top of a 'Media' page and is also used in the "Video Category" listing.

Body
The Body field is optional; this will display on the 'Media' page in the 'Description' section.

Category
A value from the dropdown must be selected. This is also used to group media on the "Video Category" listing.

If you require a new category for your content, contact the UL Applications team: open a ticket.
Authenticated
If left unchecked, the uploaded media will be available for public access; if checked, it will be available for access only by UNM personnel and students only (accessible on campus or via EZProxy off campus).
This checkbox is also used by the next field (a dropdown) to determine which optional media directories are available.
Directory / Authenticated Directory
The Directory (or Authenticated Directory) dropdown is optional and useful to further organize uploaded files on the server.

When the Authenticated checkbox is checked,
the Authenticated Directory dropdown replaces the Directory dropdown.

Media Upload
The Media Upload field is used to upload your Media file. The allowed file types are listed below the field.

![]() You must wait until the video has completed uploading before clicking the save button (if you click save before it's finished, the upload will be effectively 'canceled')
You must wait until the video has completed uploading before clicking the save button (if you click save before it's finished, the upload will be effectively 'canceled')
Example of the field after upload has completed.
Please note: this field is marked as optional. This allows you to work on the page and save your progress prior to uploading the media file.
Tags
Tags are optional; they appear in the description box when viewing a 'Media' page. Similar to category, tags are used to both describe the content and group similar content; unlike category, you can specify several tags for a page (or none).

Thumbnail
This field is not currently used, but will be in a future phase.

Read Only fields
The rest of the fields are read only. These values are not populated on a new media page until processing is completed by the transcoding queue.
Media URL
This is the URL directly to the Media Upload (post upload/transcode). You'll need this when requesting the Media Upload be deleted from the server.

Queue Filename
This is the name of the original queue file for the Media Upload. For the most part, you'll never need to know what this is, but if you run into trouble with an upload, it may be helpful for those troubleshooting.

Embed Code
This is nearly the same bit of HTML code used to display the Media Upload on LibMedia, except it's intended to be embedded in another site.

Caption Files and Language Codes
The Caption Files upload field is used to upload caption files that correspond to your Media file. The allowed file types are listed below.
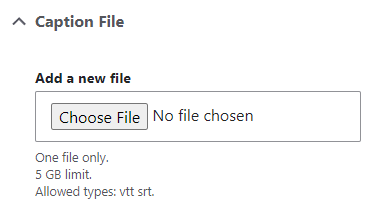
You must select a language code by typing into the Language Code text box. "en" is a placeholder.

Multiple caption files and language codes are allowed; however, only one caption file and language code are allowed per section. Click on the "Add Caption Files" button to add another section.

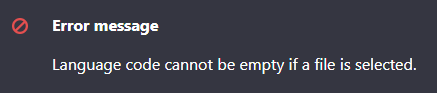
Please note: attempting to save when either the Caption File or Language Code fields are empty will result in an error.

Save
![]() You must wait until the video has completed uploading before clicking the save button (if you click save before it's finished, the upload will be effectively 'canceled').
You must wait until the video has completed uploading before clicking the save button (if you click save before it's finished, the upload will be effectively 'canceled').
Once you have filled in the fields, remember to click the save button!
Once you've saved the page, the media upload will be placed in the transcoding queue and will be available as soon as the job has completed. View the test example created by the UL Applications team to get a better understanding of what your finished media content will look like.
Known Issues
Updating Existing Content
Currently some fields may not behave as expected when updating the values and require some steps by the UL Applications team. The fields include the 'Authenticated' checkbox, either the 'Directory' or 'Authenticated Directory' dropdown and the 'Media Upload' field. (A future release is expected to address this).
The rest of the fields behave as expected (so feel free to edit as usual).
Deleting Content
Currently, when a Media Page is deleted, the related video will remain available unless it is removed from the server manually. When deleting a page, please also open a ticket to the UL IT Application team and include the link visible under the edit form for the page.

Uploaded Media does not Save
This is an issue that only occurs under specific circumstances (currently not identified). After the upload completes and the user clicks save, the uploaded media does not save with the page. You can retry the upload, but if it still fails (or you'd rather skip the retry), contact the UL Applications team for assistance: open a ticket. Please include the url for the new page and the filename of the upload.
How long will the Transcoding Take
If all goes well, your uploaded video will take about 1/5 of the run-time of the video to transcode. Unfortunately, the answer isn't as simple as that. The encoding job runs on a timer and there may be other videos as well. Overall, we do not expect there to be a high volume of videos to transcode, so if it seems the video has been 'stuck' at some point, please feel free to reach out to the UL Applications team for assistance: open a ticket and include the url for the page.
